
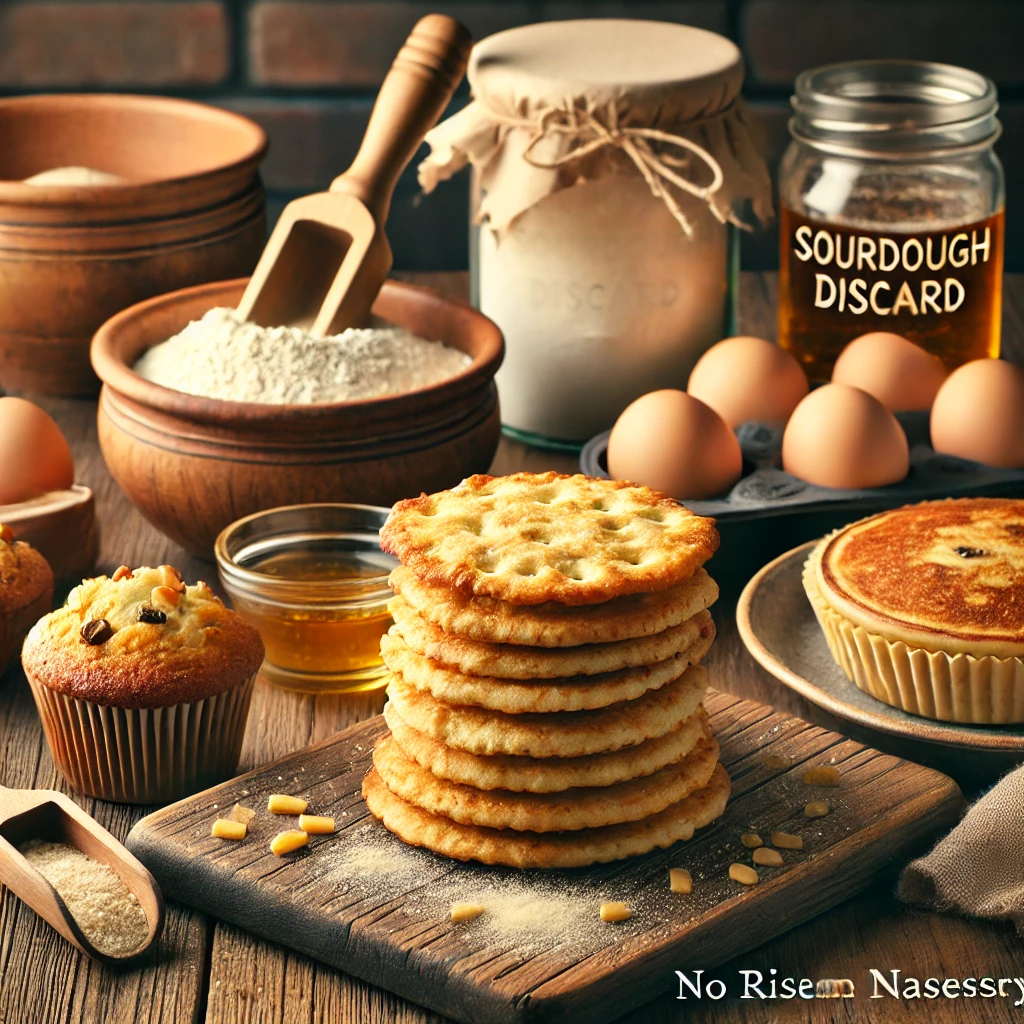
If you’ve ever found yourself tossing out sourdough starter during feedings, you’re not alone.
But guess what?
There’s no need to waste that discard anymore! Instead, you can transform it into delicious baked goods and meals with these 10 easy sourdough discard recipes.
Whether you’re craving a quick breakfast, snack, or even a hearty dinner, these recipes are a perfect way to use up that extra starter while adding a unique flavor to your cooking.
Plus, you’ll love how simple they are to whip up, making them perfect for your weekly baking routine!
What is Sourdough Discard?
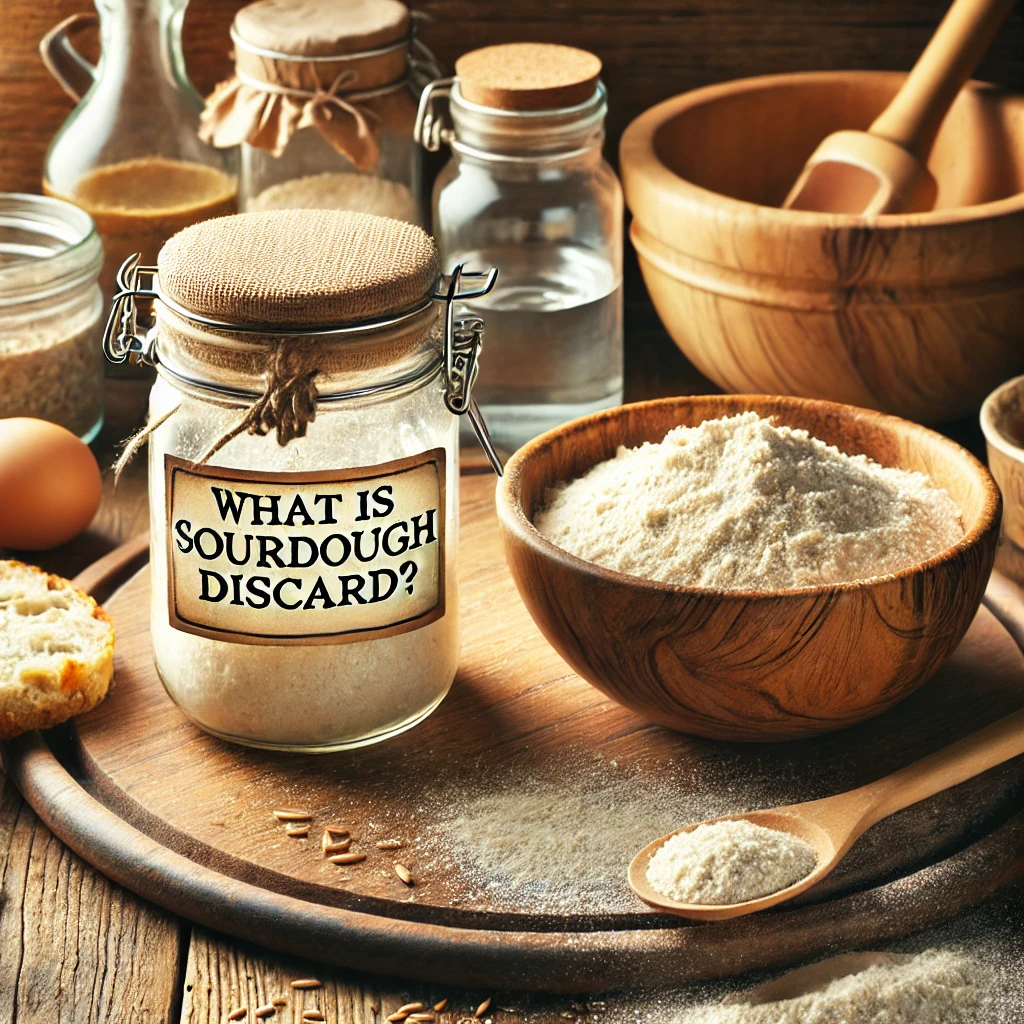
Sourdough discard is the portion of sourdough starter that is removed when you refresh or “feed” your sourdough.
A healthy sourdough starter is maintained by regularly adding fresh flour and water to keep it active and thriving.
However, to avoid ending up with an overwhelming amount of starter, a portion is “discarded” before each feeding.
This removed portion is what is known as sourdough discard.
Though it may seem like waste, sourdough discard is still a valuable ingredient, rich in flavor and packed with beneficial microorganisms.
Unlike an active starter that’s ready to make bread rise, discard is not typically bubbly or strong enough to leaven bread on its own, as it lacks the full yeast activity.
But it retains its tangy, fermented taste, which makes it ideal for incorporating into recipes that don’t require a rise, like pancakes, waffles, crackers, biscuits, and even sweet treats like brownies and cakes.
Why Use Sourdough Discard?
Using sourdough discard is an excellent way to reduce food waste and add depth of flavor to your baking.
Rather than throwing away the removed starter, you can incorporate it into a variety of recipes, infusing them with the distinct, mildly tangy flavor that comes from fermentation.
The discard also brings additional nutritional benefits, as it contains the same wild yeast and lactobacillus bacteria that help break down grains and make nutrients more digestible.
How to Store Sourdough Discard:
Sourdough discard can be stored in the refrigerator for up to a week and used when you’re ready to bake.
Some bakers even keep a separate container of discard, adding to it over time until they have enough to use in a recipe.
If you’re not ready to use it immediately, sourdough discard can also be frozen for later use.
Simply freeze it in a sealed container, and when you’re ready to bake, let it thaw and mix it into your chosen recipe.
Is Sourdough Discard the Same as Active Starter?
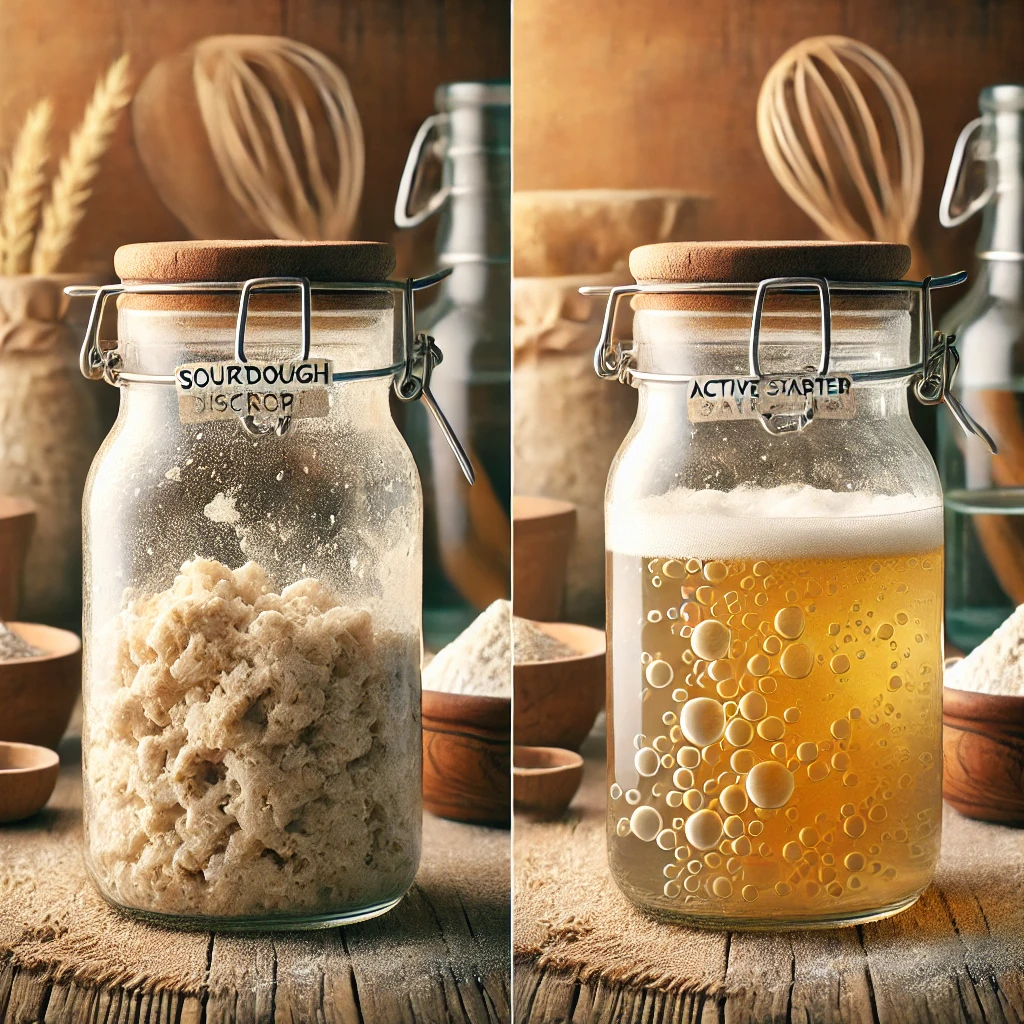
No, sourdough discard and active starter serve different purposes.
Active starter is bubbly, lively, and strong enough to leaven bread, meaning it can make dough rise.
Sourdough discard, on the other hand, lacks the yeast strength necessary for rising dough but is still full of flavor and can be used in recipes that don’t require significant rise, such as quick breads, pancakes, and crackers.
Incorporating Sourdough Discard Into Recipes:
When using sourdough discard in recipes, it typically replaces a portion of the liquid or flour.
Its texture can range from runny to thicker, depending on how hydrated the starter was before discarding.
Because discard is mildly acidic due to fermentation, it can enhance the flavor profile of both savory and sweet recipes, adding a depth of flavor not found in regular dough or batter.
In short, sourdough discard is a versatile ingredient that’s easy to incorporate into everyday recipes, making it a valuable component of any baker’s kitchen!
10 Easy Sourdough Discard Recipes
These easy sourdough discard recipes are perfect for beginners and seasoned bakers alike.
1. Fluffy Sourdough Discard Pancakes
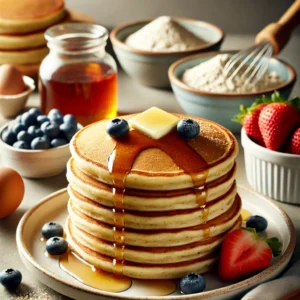
Fluffy Sourdough Discard Pancakes
Ingredients
- 1 cup sourdough discard
- 1 cup sourdough discard
- 1 cup all-purpose flour
- 1 tablespoon sugar
- 1 tablespoon baking powder
- 1/4 teaspoon salt
- 1 large egg
- 1 cup milk or plant-based milk
- 2 tablespoons melted butter plus extra for cooking
- 1 teaspoon vanilla extract optional
Instructions
- Preheat the Pan: Preheat a non-stick skillet or griddle over medium heat and lightly grease it with butter.
- Mix the Dry Ingredients: In a large mixing bowl, whisk together the flour, sugar, baking powder, and salt.
- Combine Wet Ingredients: In a separate bowl, mix the sourdough discard, egg, milk, melted butter, and vanilla extract (if using).
- Combine the Mixtures: Pour the wet ingredients into the dry ingredients and stir just until combined. Be careful not to overmix; a few lumps are okay.
- Cook the Pancakes: Drop 1/4 cup of batter onto the heated skillet. Cook until bubbles form on the surface, about 2-3 minutes, then flip and cook the other side until golden brown.
- Serve Hot: Serve the pancakes warm with butter, syrup, or fresh fruit.
Notes
Nutritional Information (per serving):
- Calories: ~250 kcal
- Fat: 10g
- Carbohydrates: 33g
- Protein: 6g
- Fiber: 1g
- Sugar: 6g
Tips:
- Add blueberries or chocolate chips to the batter for a fun twist.
- These pancakes freeze well. Stack them with parchment paper in between and freeze in an airtight container for up to 3 months.
2. Crispy Sourdough Discard Crackers

Crispy Sourdough Discard Crackers
Ingredients
- 1 cup sourdough discard
- 1 cup all-purpose flour
- 2 tablespoons olive oil
- 1/2 teaspoon salt
- 1/2 teaspoon dried rosemary optional, or substitute with other herbs like thyme or oregano
- 1/4 teaspoon garlic powder optional
- Flaky sea salt for sprinkling on top
Instructions
Preheat the Oven
- Preheat your oven to 350°F (175°C) and line a baking sheet with parchment paper.
Mix the Dough
- In a medium bowl, mix the sourdough discard, flour, olive oil, salt, and any herbs or seasonings you're using (such as rosemary or garlic powder). Stir until a dough forms.
Roll the Dough
- Transfer the dough to a floured surface and roll it out thinly, about 1/8 inch thick. The thinner you roll, the crispier the crackers will be.
Cut into Shapes
- Use a pizza cutter or knife to cut the dough into small squares or rectangles. Transfer the cut crackers to the prepared baking sheet.
Season and Bake
- Lightly brush the crackers with olive oil and sprinkle with flaky sea salt. Bake for 18-20 minutes, or until golden and crisp. Keep an eye on them as they can burn quickly.
Cool and Serve
- Let the crackers cool completely on a wire rack before serving. Enjoy them with your favorite dips, cheese, or spreads.
Notes
Nutritional Information (per serving):
- Calories: ~120 kcal
- Fat: 5g
- Carbohydrates: 17g
- Protein: 2g
- Fiber: 1g
- Sugar: 0g
Tips:
- Customize the Flavor: Feel free to experiment with different herbs and spices, such as cumin, paprika, or black pepper, to create your favorite flavor combinations.
- Storing: These crackers can be stored in an airtight container for up to one week to maintain their crispness.
Enjoy your crispy and tangy sourdough discard crackers as a perfect homemade snack!
3. Cheesy Sourdough Discard Biscuits

Cheesy Sourdough Discard Biscuits
Ingredients
- 1 cup sourdough discard
- 1 1/2 cups all-purpose flour
- 1 tablespoon baking powder
- 1/4 teaspoon baking soda
- 1/2 teaspoon salt
- 1/4 cup cold butter cubed
- 1 cup shredded cheddar cheese or your favorite cheese
- 1/2 cup milk or buttermilk
- 1 teaspoon garlic powder optional, for extra flavor
Instructions
Preheat the Oven
- Preheat your oven to 425°F (220°C) and line a baking sheet with parchment paper.
Mix Dry Ingredients
- In a large bowl, whisk together the flour, baking powder, baking soda, and salt.
Cut in the Butter
- Add the cold, cubed butter to the flour mixture. Use a pastry cutter or your fingers to work the butter into the flour until the mixture resembles coarse crumbs.
Add Cheese and Sourdough Discard
- Stir in the shredded cheese and sourdough discard until combined.
Add Milk
- Slowly pour in the milk (or buttermilk) and mix just until the dough comes together. Be careful not to overmix.
Form Biscuits
- Drop large spoonfuls of dough onto the prepared baking sheet, leaving space between each biscuit.
Bake
- Bake for 12-15 minutes, or until the biscuits are golden brown on top and cooked through.
Serve Hot
- Serve warm with a dab of butter or enjoy them on their own as a cheesy treat.
- Nutritional Information (per biscuit):
- Calories: ~180 kcal
- Fat: 10g
- Carbohydrates: 18g
- Protein: 6g
- Fiber: 1g
- Sugar: 1g
Notes
- Custom Cheese Blend: Feel free to experiment with other cheeses like Parmesan or Gouda for a unique flavor.
- Storage: Store leftover biscuits in an airtight container for up to 3 days. You can also freeze them for longer storage and reheat when needed.
4. Sourdough Discard Pizza Crust
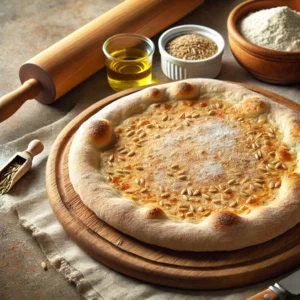
Sourdough Discard Pizza Crust
Ingredients
- 1 cup sourdough discard
- 2 cups all-purpose flour
- 1 teaspoon instant yeast optional for quicker rise
- 1 tablespoon olive oil
- 1/2 cup warm water adjust as needed
- 1 teaspoon salt
- 1 teaspoon sugar optional, helps with rising
Instructions
Mix the Dough
- In a large mixing bowl, combine the sourdough discard, flour, olive oil, salt, and sugar. Add the warm water gradually, mixing until a sticky dough forms. If using yeast, add it here to speed up the rising process.
Knead the Dough
- Knead the dough for about 5-7 minutes until it becomes smooth and elastic. You can do this on a floured surface or in the bowl if it’s easier.
Let it Rise
- Transfer the dough to a lightly oiled bowl, cover it with a damp towel or plastic wrap, and let it rise for 1 hour, or until doubled in size. If using discard without added yeast, the rise may take longer (up to 2 hours).
Preheat the Oven
- Preheat your oven to 450°F (230°C). If you have a pizza stone, place it in the oven to preheat as well for a crispier crust.
Shape the Dough
- Once the dough has risen, punch it down and divide it into two equal parts. Roll out each portion into a round pizza shape, about 1/4 inch thick, on a floured surface.
Pre-bake the Crust
- Transfer the dough to a baking sheet or pizza stone. Pre-bake the crust for 5-7 minutes until it starts to set but isn’t fully cooked.
Add Toppings and Bake
- Remove the crust from the oven, add your desired pizza toppings, and bake for another 10-12 minutes, or until the crust is golden brown and the toppings are cooked through.
Serve Hot
- Slice and serve your delicious homemade pizza with your favorite toppings!
Notes
Nutritional Information (per slice, without toppings):
- Calories: ~150 kcal
- Fat: 4g
- Carbohydrates: 24g
- Protein: 4g
- Fiber: 1g
- Sugar: 1g
Tips:
- Customize the Crust: For a thicker crust, allow the dough to rise for an additional 30 minutes after shaping.
- Make it Crispy: For a crispier crust, preheat a pizza stone and cook the pizza directly on it.
- Storing Dough: You can make the dough ahead and refrigerate it for up to 24 hours or freeze it for longer storage.
5. Sourdough Discard Waffles
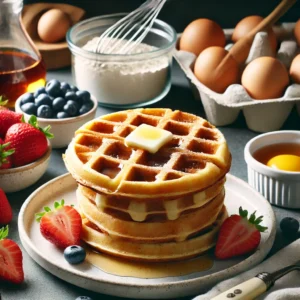
Sourdough Discard Waffles
Ingredients
- 1 cup sourdough discard
- 1 cup all-purpose flour
- 1 tablespoon sugar
- 1 tablespoon baking powder
- 1/4 teaspoon salt
- 1 large egg
- 1 cup milk or plant-based milk
- 2 tablespoons melted butter plus more for greasing the waffle iron
- 1 teaspoon vanilla extract optional
Instructions
Preheat the Waffle Iron
- Plug in your waffle iron and let it preheat while you prepare the batter.
Combine Wet Ingredients
- In a separate bowl, mix the sourdough discard, egg, milk, melted butter, and vanilla extract (if using).
Combine Wet and Dry Ingredients:
- Pour the wet ingredients into the dry ingredients and stir until just combined. Avoid overmixing; a few lumps are okay.
Cook the Waffles
- Grease the waffle iron with a little butter or nonstick spray. Pour about 1/2 cup of batter (depending on your waffle iron size) into the center and close the lid. Cook until the waffles are golden brown and crisp, about 4-6 minutes, depending on your waffle iron.
Serve Hot
- Remove the waffle and repeat with the remaining batter. Serve warm with your favorite toppings like syrup, fruit, or whipped cream.
NUTRITIONAL INFORMATION (PER WAFFLE):
- Calories: ~250 kcal
- Fat: 11g
- Carbohydrates: 30g
- Protein: 6g
- Fiber: 1g
- Sugar: 5g
Notes
- Topping Ideas: Serve with maple syrup, fresh berries, whipped cream, or even a dollop of yogurt for a healthier option.
- Freezing Leftovers: These waffles freeze beautifully. Let them cool completely, then store them in an airtight container or freezer bag. Reheat in a toaster or oven for crispy waffles.
6. Sourdough Discard Cinnamon Rolls
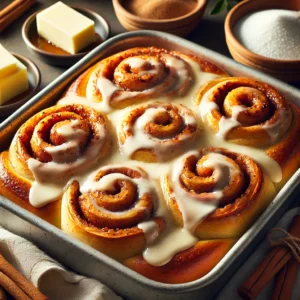
Sourdough Discard Cinnamon Rolls
Instructions
For the Dough:
- 1 cup sourdough discard
- 1/2 cup warm milk
- 1/4 cup granulated sugar
- 1 packet (2 1/4 tsp) active dry yeast
- 1/4 cup melted butter
- 1 large egg
- 3 to 3 1/2 cups all-purpose flour
- 1/2 teaspoon salt
For the Filling:
- 1/2 cup softened butter
- 1/2 cup brown sugar
- 2 tablespoons ground cinnamon
- 1/4 teaspoon ground nutmeg (optional)
For the Cream Cheese Glaze:
- 4 oz cream cheese, softened
- 1/4 cup unsalted butter, softened
- 1 cup powdered sugar
- 1/2 teaspoon vanilla extract
- 1-2 tablespoons milk (to adjust consistency)
Prepare the Dough:
- Activate the Yeast: In a small bowl, combine warm milk and yeast with 1 tablespoon of sugar. Stir and let it sit for 5-10 minutes until frothy.
- Mix Wet Ingredients: In a large bowl, combine the sourdough discard, melted butter, remaining sugar, egg, and the yeast mixture. Stir until smooth.
- Add Flour: Gradually add 3 to 3 1/2 cups of flour and salt to the wet mixture. Mix until a dough forms. It should be soft and slightly sticky but pulling away from the sides of the bowl.
- Knead the Dough: Turn the dough onto a floured surface and knead for about 8-10 minutes until smooth and elastic. Alternatively, you can knead the dough in a stand mixer with the dough hook attachment.
- Let it Rise: Place the dough in a greased bowl, cover it with a clean towel, and let it rise for about 1-2 hours, or until doubled in size.
Prepare the Filling and Roll the Dough:
- Prepare Filling: In a small bowl, mix the softened butter, brown sugar, cinnamon, and nutmeg (if using) until well combined.
- Roll the Dough: Once the dough has risen, punch it down and roll it out on a floured surface into a rectangle (about 12×18 inches).
- Spread the Filling: Evenly spread the cinnamon-sugar mixture over the dough, leaving a small border around the edges.
- Roll and Slice: Starting from the long side, tightly roll the dough into a log. Cut the log into 12 equal slices.
Bake the Cinnamon Rolls:
- Prepare the Pan: Place the cinnamon rolls in a greased 9×13 inch baking dish, leaving a little space between each roll. Cover and let them rise for an additional 30-45 minutes.
- Bake: Preheat the oven to 350°F (175°C). Bake the rolls for 20-25 minutes, or until golden brown and cooked through.
Make the Cream Cheese Glaze:
- Prepare the Glaze: In a bowl, beat the cream cheese, butter, powdered sugar, vanilla, and milk until smooth and creamy.
- Glaze the Rolls: Once the rolls are done baking, let them cool for 10 minutes before spreading the cream cheese glaze on top.
NUTRITIONAL INFORMATION (per roll):
- Fat: 13g
- Carbohydrates: 42g
- Protein: 5g
- Sugar: 21g
- Fiber: 1g
Notes
- Overnight Option: You can prepare the rolls the night before. After shaping the rolls and placing them in the pan, cover tightly and refrigerate overnight. The next morning, let them come to room temperature and rise for 45 minutes before baking.
- Storing Leftovers: These cinnamon rolls can be stored in an airtight container at room temperature for 2-3 days or in the fridge for up to a week.
7. Sourdough Discard Banana Bread
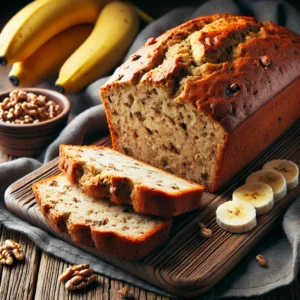
Sourdough Discard Banana Bread
Ingredients
- 1 cup sourdough discard
- 1 1/2 cups mashed ripe bananas about 3 medium bananas
- 1/2 cup melted butter or oil
- 3/4 cup granulated sugar
- 2 large eggs
- 1 teaspoon vanilla extract
- 1 3/4 cups all-purpose flour
- 1 teaspoon baking soda
- 1/2 teaspoon salt
- 1/2 teaspoon cinnamon optional
- 1/2 cup chopped walnuts or chocolate chips optional
Instructions
- Preheat the Oven: Preheat your oven to 350°F (175°C). Grease a 9×5 inch loaf pan or line it with parchment paper.
- Mix Wet Ingredients: In a large bowl, whisk together the mashed bananas, sourdough discard, melted butter, sugar, eggs, and vanilla extract until well combined.
- Add Dry Ingredients: In a separate bowl, whisk together the flour, baking soda, salt, and cinnamon (if using).
- Combine Wet and Dry: Gradually add the dry ingredients to the wet mixture, stirring just until combined. Be careful not to overmix.
- Fold in Extras: If using walnuts or chocolate chips, gently fold them into the batter.
- Bake: Pour the batter into the prepared loaf pan and bake for 60-70 minutes, or until a toothpick inserted into the center comes out clean.
- Cool and Serve: Let the banana bread cool in the pan for 10 minutes, then transfer it to a wire rack to cool completely before slicing and serving.
NUTRITIONAL INFORMATION (per slice):
- Fat: 10g
- Carbohydrates: 37g
- Protein: 4g
- Sugar: 18g
- Fiber: 2g
Notes
- Banana Ripeness: The riper the bananas, the sweeter and more flavorful your banana bread will be.
- Storage: Store the banana bread in an airtight container at room temperature for up to 3 days, or refrigerate for up to a week. You can also freeze it for up to 3 months.
- Extra Flavor: For added flavor, sprinkle a little sugar or cinnamon on top of the batter before baking to create a sweet crust.
8. Savory Sourdough Discard Muffins

Savory Sourdough Discard Muffins
Ingredients
- 1 cup sourdough discard
- 1 1/2 cups all-purpose flour
- 1 tablespoon baking powder
- 1/2 teaspoon salt
- 1/4 teaspoon black pepper
- 1/2 teaspoon garlic powder optional
- 1/2 teaspoon dried thyme or rosemary optional
- 2 large eggs
- 1/2 cup milk
- 1/4 cup melted butter or olive oil
- 1 cup shredded cheddar cheese or your favorite cheese
- 1/2 cup cooked and crumbled bacon or diced ham optional
- 1/4 cup chopped green onions optional
Instructions
- Preheat the Oven: Preheat your oven to 375°F (190°C) and line a 12-cup muffin tin with paper liners or grease the cups well.
- Mix Dry Ingredients: In a large bowl, whisk together the flour, baking powder, salt, black pepper, garlic powder, and herbs.
- Mix Wet Ingredients: In a separate bowl, whisk together the sourdough discard, eggs, milk, and melted butter or olive oil until smooth.
- Combine Wet and Dry: Add the wet ingredients to the dry ingredients and stir until just combined.
- Fold in Cheese and Add-ins: Gently fold in the shredded cheese, crumbled bacon or ham (if using), and chopped green onions until evenly distributed.
- Fill Muffin Tin: Divide the batter evenly among the prepared muffin cups, filling each about 3/4 full.
- Bake: Bake for 20-25 minutes, or until the muffins are golden brown and a toothpick inserted into the center comes out clean.
- Cool and Serve: Let the muffins cool in the pan for a few minutes before transferring them to a wire rack to cool completely. Serve warm or at room temperature.
NUTRITIONAL INFORMATION (per muffin):
- Fat: 12g
- Carbohydrates: 18g
- Protein: 7g
- Sugar: 1g
- Fiber: 1g
Notes
Recipe Tips:
- Use Room Temperature Ingredients: For best results, make sure your eggs, milk, and sourdough discard are at room temperature. This helps the ingredients blend more smoothly and results in lighter, fluffier muffins.
- Customize the Add-Ins: Feel free to switch up the cheese, meats, and veggies to suit your taste. Try using different cheeses like Gruyère or feta, or replace the bacon with cooked sausage, ham, or even chopped spinach for a vegetarian option.
- Don’t Overmix: When combining the wet and dry ingredients, mix until just combined. Overmixing can lead to dense muffins instead of light, fluffy ones.
- Make Ahead: These muffins store well! You can bake them in advance and store them in an airtight container for up to 3 days at room temperature, or in the refrigerator for up to a week. They also freeze well for up to 3 months. Reheat in the microwave or oven before serving.
- Adjust for Dietary Preferences: Substitute the dairy with plant-based milk and cheese to make these muffins dairy-free. For gluten-free muffins, use a gluten-free flour blend in place of all-purpose flour.
- Extra Crunch: If you like a bit of crunch on top, sprinkle the muffins with some extra shredded cheese or breadcrumbs before baking for a crisp, cheesy top.
- Portioning Batter: Use a large ice cream scoop or spoon to ensure the batter is evenly portioned into the muffin tin, helping each muffin bake uniformly.
These tips will help ensure your savory muffins turn out perfectly every time!
9. Sourdough Discard Fritters

Sourdough Discard Fritters
Ingredients
- 1 cup sourdough discard
- 1/2 cup all-purpose flour
- 1 large egg
- 1/4 cup milk
- 1/2 teaspoon baking powder
- 1/2 teaspoon salt
- 1/4 teaspoon black pepper
- 1 cup grated zucchini or corn or both
- 1/4 cup grated Parmesan cheese optional
- 1/4 cup chopped green onions or fresh herbs
- 1/2 teaspoon garlic powder optional
- Oil for frying vegetable or olive oil
Instructions
- Prepare the Batter: In a medium bowl, whisk together the sourdough discard, flour, egg, milk, baking powder, salt, and pepper until smooth.
- Add Vegetables and Cheese: Fold in the grated zucchini or corn, Parmesan cheese (if using), green onions, and garlic powder until well combined.
- Heat the Oil: Heat about 1/4 inch of oil in a large skillet over medium heat until shimmering but not smoking.
- Fry the Fritters: Scoop about 2 tablespoons of batter for each fritter into the hot oil, flattening slightly with the back of the spoon. Fry for 2-3 minutes on each side, or until golden brown and crispy.
- Drain and Serve: Remove the fritters from the skillet and place them on a plate lined with paper towels to drain any excess oil. Serve warm with your favorite dipping sauce.
NUTRITIONAL INFORMATION (per fritter):
- Fat: 9g
- Carbohydrates: 20g
- Protein: 6g
- Sugar: 2g
- Fiber: 2g
Notes
Recipe Tips:
- Dry the Zucchini: If using zucchini, be sure to squeeze out excess moisture before adding it to the batter. This will prevent soggy fritters.
- Test the Oil: To ensure the oil is the right temperature for frying, drop a small amount of batter into the skillet. If it sizzles and browns evenly, the oil is ready.
- Make it Gluten-Free: Swap the all-purpose flour for a gluten-free flour blend to make these fritters gluten-free.
- Vegetable Variations: Feel free to add other vegetables like grated carrots, chopped bell peppers, or even spinach to the batter.
- Serving Suggestion: Serve with a fresh salad or a dipping sauce like tzatziki, sour cream, or a spicy sriracha mayo.
- Storage: These fritters are best served fresh, but you can refrigerate leftovers for up to 3 days and reheat them in the oven to retain their crispiness.
10. Sourdough Discard Chocolate Cake
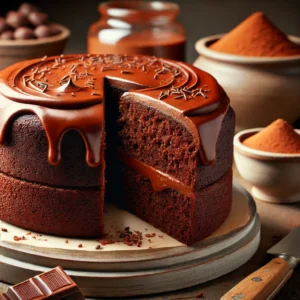
Sourdough Discard Chocolate Cake
Ingredients
For the Cake:
- 1 cup sourdough discard
- 1 1/2 cups all-purpose flour
- 1/2 cup unsweetened cocoa powder
- 1 teaspoon baking soda
- 1/2 teaspoon baking powder
- 1/2 teaspoon salt
- 1 cup granulated sugar
- 1/2 cup brown sugar
- 2 large eggs
- 1/2 cup vegetable oil or melted butter
- 1 cup buttermilk or 1 cup milk + 1 tablespoon vinegar
- 1 teaspoon vanilla extract
For the Frosting:
- Make the Frosting: In a bowl beat together the softened butter, powdered sugar, cocoa powder, milk, and vanilla extract until smooth and fluffy. Add more milk as needed to reach your desired consistency.
- Frost the Cake: Once the cake is completely cool frost it with the chocolate frosting.
Instructions
For the Frosting (optional):
- 1/2 cup unsalted butter, softened
- 1 1/2 cups powdered sugar
- 1/4 cup unsweetened cocoa powder
- 1-2 tablespoons milk
- 1 teaspoon vanilla extract
For the Cake:
- Preheat the Oven: Preheat your oven to 350°F (175°C). Grease and flour a 9-inch round cake pan or line it with parchment paper.
- Mix Dry Ingredients: In a large bowl, whisk together the flour, cocoa powder, baking soda, baking powder, and salt.
- Combine Wet Ingredients: In a separate bowl, whisk together the sourdough discard, sugars, eggs, oil, buttermilk, and vanilla extract until smooth.
- Combine Wet and Dry: Gradually add the dry ingredients to the wet mixture, stirring until just combined. Be careful not to overmix.
- Bake: Pour the batter into the prepared cake pan and bake for 35-40 minutes, or until a toothpick inserted into the center comes out clean.
- Cool: Let the cake cool in the pan for 10 minutes, then transfer it to a wire rack to cool completely.
NUTRITIONAL INFORMATION (per slice):
- Fat: 15g
- Carbohydrates: 52g
- Protein: 4g
- Sugar: 32g
- Fiber: 2g
Notes
Recipe Tips:
- Room Temperature Ingredients: Make sure your eggs and buttermilk are at room temperature for better mixing and a fluffier cake.
- Sift the Cocoa: Sifting the cocoa powder with the dry ingredients will ensure a smooth, lump-free batter.
- Don’t Overmix: Once you combine the wet and dry ingredients, mix just until incorporated to avoid a dense cake.
- Flavor Additions: Add chocolate chips or chopped nuts into the batter for extra texture and flavor.
- Make Ahead: The cake can be made a day ahead and stored at room temperature, covered tightly. Frost it before serving for the freshest taste.
- Storing Leftovers: Leftover cake can be stored in an airtight container at room temperature for 2-3 days, or in the refrigerator for up to a week.
Why You’ll Love These Recipes
If you’re a sourdough enthusiast or even just starting with sourdough baking, you’ll find that using sourdough discard in recipes offers a fantastic way to get the most out of your starter while minimizing waste.
Here’s why you’ll love these sourdough discard recipes:
1. Reduce Food Waste
One of the biggest perks of sourdough discard recipes is that they help reduce food waste.
When maintaining a sourdough starter, you’re required to regularly “discard” a portion to keep the microbial balance intact and prevent your starter from becoming too large.
Rather than throwing this discard away, you can repurpose it in a variety of delicious recipes.
Using discard ensures that every part of your starter is put to good use, which is not only satisfying but environmentally conscious.
2. Simple and Versatile
Sourdough discard recipes are incredibly versatile and easy to incorporate into your regular cooking routine.
From sweet treats like pancakes, brownies, and cakes to savory snacks like crackers, biscuits, and pizza crust, there’s virtually no limit to what you can make.
These recipes don’t require much extra time or special techniques, so you can effortlessly incorporate sourdough discard into everyday meals without complicated steps or equipment.
This means you can enjoy sourdough’s rich flavor without the extended time commitment of making bread.
3. Flavor Boost
Sourdough discard adds a unique, tangy flavor to recipes that you simply won’t get with regular flour.
The naturally occurring wild yeast and bacteria in the discard give it a mild sourness from the fermentation process, which can elevate the flavor profile of both sweet and savory dishes.
Whether it’s the subtle hint of sourness in pancakes or the depth of flavor in pizza crust, sourdough discard brings complexity to your recipes.
The flavor isn’t overwhelming, but it enhances each dish with a delightful nuance.
4. Nutritional Benefits
Fermented foods like sourdough discard offer added nutritional benefits.
The natural fermentation process makes the grains more digestible, breaking down phytic acid and making nutrients like minerals and vitamins easier for your body to absorb.
Sourdough discard also contains beneficial probiotics that support gut health.
So, when you bake with sourdough discard, you’re not only enjoying delicious food, but you’re also incorporating healthier ingredients into your meals.
5. Quick and Easy Recipes
Unlike traditional sourdough bread, which can take hours (or even days) to rise, sourdough discard recipes are much quicker and easier.
These recipes often require no rise time, meaning you can whip up a batch of crackers, pancakes, or muffins in under an hour.
This makes sourdough discard recipes ideal for busy mornings or when you’re looking for a quick snack or side dish.
6. Perfect for Experimentation
Sourdough discard recipes give you the freedom to experiment with flavors, textures, and ingredients.
The tangy sourdough flavor pairs well with a variety of ingredients, allowing you to get creative in the kitchen.
Whether you’re adding chocolate chips to sourdough discard banana bread or incorporating fresh herbs into savory crackers, the possibilities are endless.
You can also adjust recipes to fit dietary preferences, such as swapping out dairy or using gluten-free flours.
7. Great for Feeding a Crowd
Many sourdough discard recipes are perfect for making larger batches, making them ideal for feeding a family or entertaining guests.
Whether you’re serving a stack of fluffy pancakes for brunch or baking a batch of biscuits or fritters for a dinner party, these recipes are crowd-pleasers.
The tangy sourdough flavor is often a delightful surprise to guests, and the versatility of these recipes allows you to customize them to fit the preferences of your audience.
8. Cost-Effective
Using sourdough discard is a great way to make your baking more economical.
Since you’re already maintaining a sourdough starter, the discard is essentially a free ingredient that would otherwise go to waste.
This means you can create flavorful dishes without needing to purchase extra leavening agents or specialized ingredients.
By repurposing your discard, you’re stretching your starter’s value and getting more out of your kitchen pantry.
9. Perfect for Beginner and Advanced Bakers
Whether you’re just starting your baking journey or you’re an experienced baker, sourdough discard recipes are approachable for all skill levels.
They provide a low-stakes way for beginners to experiment with sourdough without the complexities of long fermentation or proofing times.
At the same time, advanced bakers can appreciate the rich flavors and flexibility these recipes offer.
Regardless of your experience level, these recipes will give you a rewarding baking experience.
10. Family-Friendly
Sourdough discard recipes are perfect for families! From pancakes to biscuits and muffins, these dishes are sure to please both kids and adults alike.
Plus, the recipes can be fun for children to participate in—whether it’s mixing batter, adding toppings, or shaping dough.
Sourdough discard baking offers a great way to introduce younger family members to cooking and baking in a fun, hands-on way.
In summary, you’ll love these sourdough discard recipes because they offer a flavorful, waste-free, and nutritious way to bake, with endless options for both sweet and savory dishes.
Whether you’re looking for something quick and easy or hoping to experiment with new flavors, sourdough discard recipes are a fantastic addition to your culinary repertoire!
How to Store and Freeze Sourdough Discard Recipes
Whether you’re making sourdough discard pancakes, crackers, biscuits, or muffins, storing and freezing these recipes properly can help you enjoy them for days (or even weeks) after baking.
Here’s how to make sure your sourdough discard creations stay fresh, flavorful, and ready to be enjoyed whenever you need a quick snack or meal.
Storing Sourdough Discard Recipes:
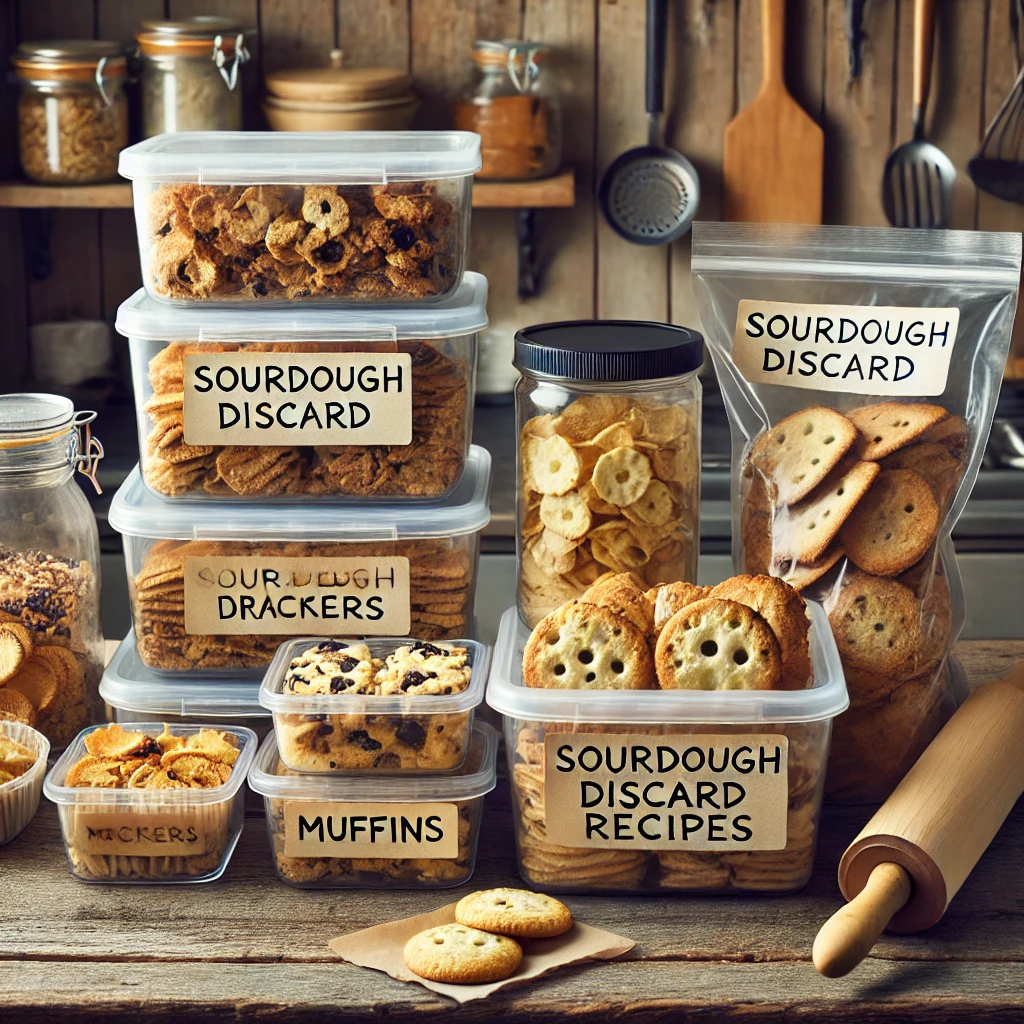
- Room Temperature Storage (Short-Term): Many sourdough discard recipes, such as pancakes, biscuits, muffins, or crackers, can be stored. Here’s how:
- Pancakes, Waffles, and Muffins: After they’ve completely cooled, place them in an airtight container or resealable plastic bag. These can stay fresh at room temperature for about 2-3 days. If you live in a warm or humid environment, it’s best to refrigerate them to prevent spoilage.
- Crackers and Biscuits: For recipes that have a drier texture like crackers or biscuits, they can be stored in an airtight container or sealed bag for up to 5 days. Crackers especially should be kept in a cool, dry place to maintain their crispiness.
- Avoid Storing Warm: Never store baked goods while they are still warm, as this will create condensation and lead to sogginess. Always allow your sourdough discard recipes to cool completely before storing.
- Refrigeration (Medium-Term): If you don’t plan to eat your sourdough discard recipes within a couple of days, refrigerating them can extend their shelf life.
- Muffins, Biscuits, and Pancakes: Place them in an airtight container or tightly sealed plastic bag and store them in the refrigerator. They will stay fresh for up to a week. To enjoy them again, simply reheat them in the microwave, toaster oven, or conventional oven.
- Crackers: While crackers can be kept at room temperature, refrigerating them can help retain their freshness if you’re in a humid environment. Be sure to store them in an airtight container to prevent them from becoming stale.
Freezing Sourdough Discard Recipes:
Freezing is a fantastic way to preserve sourdough discard recipes for long-term storage. This method works especially well for items like pancakes, waffles, biscuits, and even muffins. Follow these steps for freezing and reheating your sourdough discard creations:
- Freezing Pancakes and Waffles:
- Step 1: Allow the pancakes or waffles to cool completely after cooking.
- Step 2: Place them in a single layer on a baking sheet and flash freeze for 1-2 hours, until they’re firm.
- Step 3: Once frozen, transfer them to a freezer-safe zip-top bag or airtight container. Be sure to label the bag with the date and type of food.
- Step 4: These can be stored in the freezer for up to 3 months.
- Reheating: When ready to eat, simply pop the pancakes or waffles in the toaster, oven, or microwave to reheat.
- Freezing Muffins and Biscuits:
- Step 1: Let the muffins or biscuits cool completely after baking.
- Step 2: Wrap each muffin or biscuit individually in plastic wrap or foil to help retain moisture and prevent freezer burn.
- Step 3: Place the wrapped items in a freezer-safe bag or container.
- Step 4: Label and date the container, and store it in the freezer for up to 3 months.
- Reheating: To reheat, you can thaw the muffins or biscuits overnight in the refrigerator or reheat them directly from frozen by placing them in the oven or microwave. Muffins can be warmed in the microwave for 20-30 seconds, while biscuits can be reheated in the oven at 350°F for 10-15 minutes to regain their crispness.
- Freezing Crackers:
- Step 1: Ensure the crackers are completely cooled before freezing, as any remaining moisture can make them soggy during storage.
- Step 2: Place the crackers in an airtight container or freezer-safe bag. You may want to place a piece of parchment paper between layers to keep them from sticking together.
- Step 3: Freeze the crackers for up to 3 months.
- Reheating: While crackers can be eaten straight from the freezer (since they don’t freeze solid), you can re-crisp them by placing them in a low-temperature oven (around 250°F) for 5-10 minutes if needed.
Pro Tips for Freezing and Reheating Sourdough Discard Recipes:
- Label Everything: It’s easy to lose track of what’s in your freezer, so make sure you label your sourdough discard recipes with the date and contents. This way, you’ll know exactly what you’re pulling out and how long it’s been stored.
- Freeze in Portions: When freezing items like pancakes, waffles, or muffins, freeze them in individual portions. This makes it easier to grab only what you need and avoids having to thaw a large batch at once.
- Prevent Freezer Burn: Freezer burn can ruin the texture and flavor of your food. To prevent this, make sure all your sourdough discard recipes are tightly wrapped in plastic or foil and stored in airtight containers or freezer-safe bags with as much air removed as possible.
- Reheat Properly: When reheating frozen sourdough discard recipes, always opt for methods that preserve texture. For example, reheat crackers or biscuits in the oven for a crispy texture, while pancakes and muffins do well in the microwave or toaster oven.
- Plan for Busy Days: Having frozen sourdough discard recipes on hand can be a lifesaver on busy mornings or during snack time. Simply pull out a few frozen pancakes, waffles, or muffins, and enjoy a delicious homemade meal or snack with minimal effort.
By properly storing and freezing your sourdough discard recipes, you can extend their shelf life and enjoy the rich flavors and textures for weeks or months to come. With the right storage methods, your sourdough discard creations will stay fresh, making it easy to whip up a homemade meal or snack anytime you need it!
Pro Tips for Working with Sourdough Discard
- Consistency Matters: If your discard is too runny, you may need to adjust the flour content in your recipes. Similarly, if it’s too thick, add a little extra liquid.
- Use Fresh Discard: For the best results, use discard that’s no more than a week old. Older discard can still be used but may have a more sour taste.
- Experiment: Don’t be afraid to play around with these recipes! Sourdough discard is flexible, and you can add in your favorite flavors or ingredients to make these dishes truly your own.
Conclusion
Next time you find yourself with extra sourdough discard, don’t toss it out!
These 10 easy sourdough discard recipes will not only save you from wasting perfectly good starter, but they’ll also become your new go-to favorites.
Whether it’s pancakes for breakfast, crackers for a snack, or pizza for dinner, these recipes are sure to impress. So give them a try and let us know which one you loved the most!
If you enjoyed these recipes, don’t forget to bookmark this page, share it with fellow bakers, and sign up for our newsletter for even more easy baking ideas!
Related Articles:
Fall in Love with This Savory Cornish Hen Recipe Tonight
How to Make the Perfect Pork Chop Brine in Just 15 Minutes with This Easy Recipe