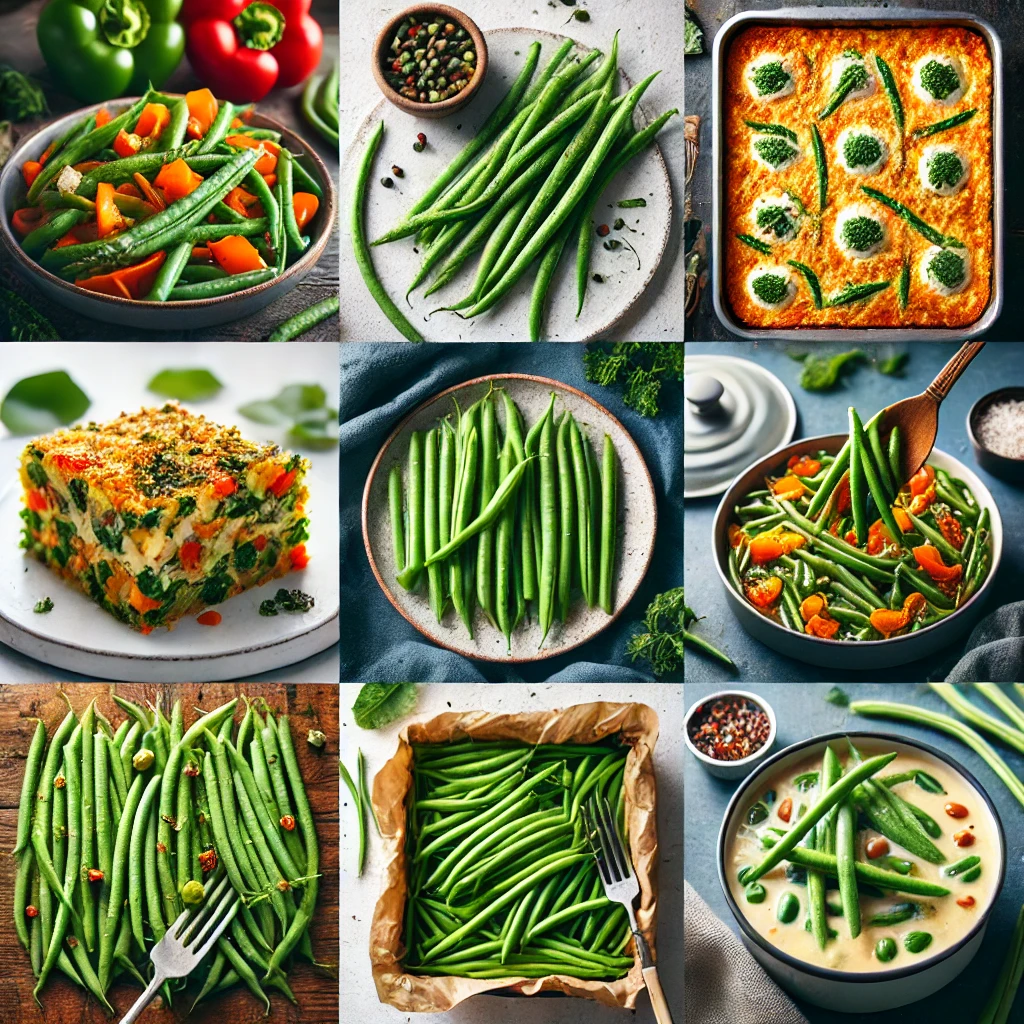
Freezing green beans is one of the most effective methods for preserving their fresh, crisp flavor for future use.
Whether you have an abundance of green beans from your garden or found a great deal at the grocery store, freezing allows you to enjoy this healthy vegetable year-round.
The secret to freezing green beans and retaining their vibrant color and texture lies in the right preparation and freezing techniques.
In this comprehensive guide, we’ll walk you through a step-by-step process for freezing green beans, share hacks for ensuring they stay crisp and flavorful, and discuss the pros and cons of different freezing methods.
By the end of this post, you’ll have all the tools you need to master the art of freezing green beans and enjoy them in a variety of ways after freezing.
Ingredient and Equipment List for Freezing Green Beans
Ingredients:
- Fresh Green Beans: Choose vibrant, firm green beans free of blemishes or soft spots.
- Water: For blanching the beans.
- Ice: To create an ice bath for quickly cooling the beans after blanching.
- Salt (Optional): A small amount of salt can be added to the blanching water to enhance flavor and help retain color, but this is optional.
Equipment:
- Large Pot: For boiling water to blanch the green beans. Make sure it’s large enough to allow the beans to circulate freely in the water.
- Large Bowl: For preparing the ice water bath to cool the beans after blanching.
- Colander: To drain the beans after blanching and before drying them.
- Slotted Spoon or Tongs: To transfer the beans from the boiling water to the ice bath without spilling hot water.
- Baking Sheet (Optional): For flash freezing the beans in a single layer to prevent clumping.
- Clean Kitchen Towel or Paper Towels: To dry the beans thoroughly before freezing.
- Freezer Bags or Airtight Containers: For storing the frozen beans. Consider using vacuum-sealable bags if you have a vacuum sealer for longer storage.
- Vacuum Sealer (Optional): If you want to remove all the air from the storage bags for optimal preservation.
- Marker or Labels: For labeling your freezer bags with the date and contents.
By gathering these simple ingredients and tools, you’ll be well-prepared to freeze green beans and keep them fresh and flavorful!
Step-by-Step Guide to Freezing Green Beans
When it comes to freezing green beans, the process is relatively simple, but there are a few critical steps you must follow to ensure the best results.
Let’s go through the process step by step, from selecting the beans to the freezing process itself.
Step 1: Select the Freshest Green Beans
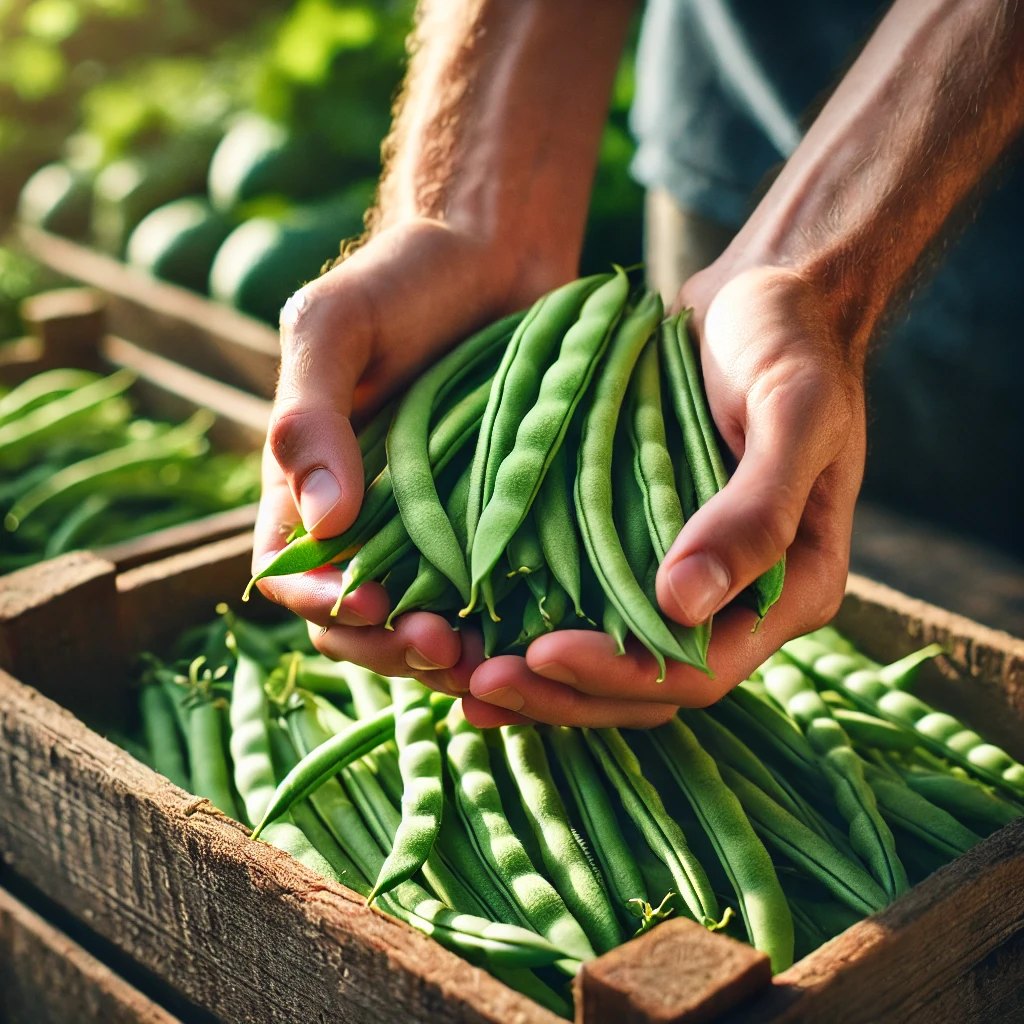
The quality of your frozen green beans is only as good as the beans you start with, so selecting the freshest, highest-quality beans is essential.
When choosing green beans for freezing, whether you’re picking them from your garden or buying them from the store or farmer’s market, there are a few characteristics to look for:
- Color: Fresh green beans should have a vibrant, bright green color.
- Avoid any beans that look yellow, brown, or spotted, as this indicates they are overripe or damaged.
- Texture: Opt for beans that are firm and snap easily when bent.
- If the beans feel limp or rubbery, they’re past their prime and won’t freeze well.
- Size: While the size of the bean can vary based on variety, choose beans that are relatively uniform in size.
- This helps ensure even cooking and freezing.
- Harvest Timing: If you’re growing your own green beans, timing is everything.
- The best time to harvest is when the beans are young, tender, and fully grown but before the seeds inside start to bulge.
- This will give you beans with the best flavor and texture for freezing.
Selecting fresh beans ensures that the freezing process captures their peak flavor, crunch, and nutrients, giving you the best results once thawed.
Step 2: Wash and Trim the Green Beans
Before freezing, it’s important to properly clean and prepare your green beans.
This step helps ensure that your frozen beans are safe to eat and free from any dirt or pesticides.
- Washing: Rinse the green beans thoroughly under cold running water.
- Be sure to rub the beans gently with your fingers to remove any dirt or residue.
- If you’re using beans from your garden, this step is especially important since they might have more dirt or even small insects clinging to them.
- Trimming: After washing, you’ll need to trim the ends of the green beans.
- Using a sharp knife or kitchen scissors, cut off the tough ends (often referred to as “stem ends”).
- If the beans are very long, you can also cut them into smaller, bite-sized pieces.
- This is optional and depends on how you plan to use the beans later—some people prefer leaving them whole for certain recipes.
- Uniformity: Whether you leave the beans whole or cut them into smaller pieces, aim for uniformity.
- Freezing beans of a similar size will ensure that they freeze and cook evenly later on.
Proper washing and trimming not only keep your green beans clean but also help create consistency in their size, leading to better freezing and cooking outcomes.
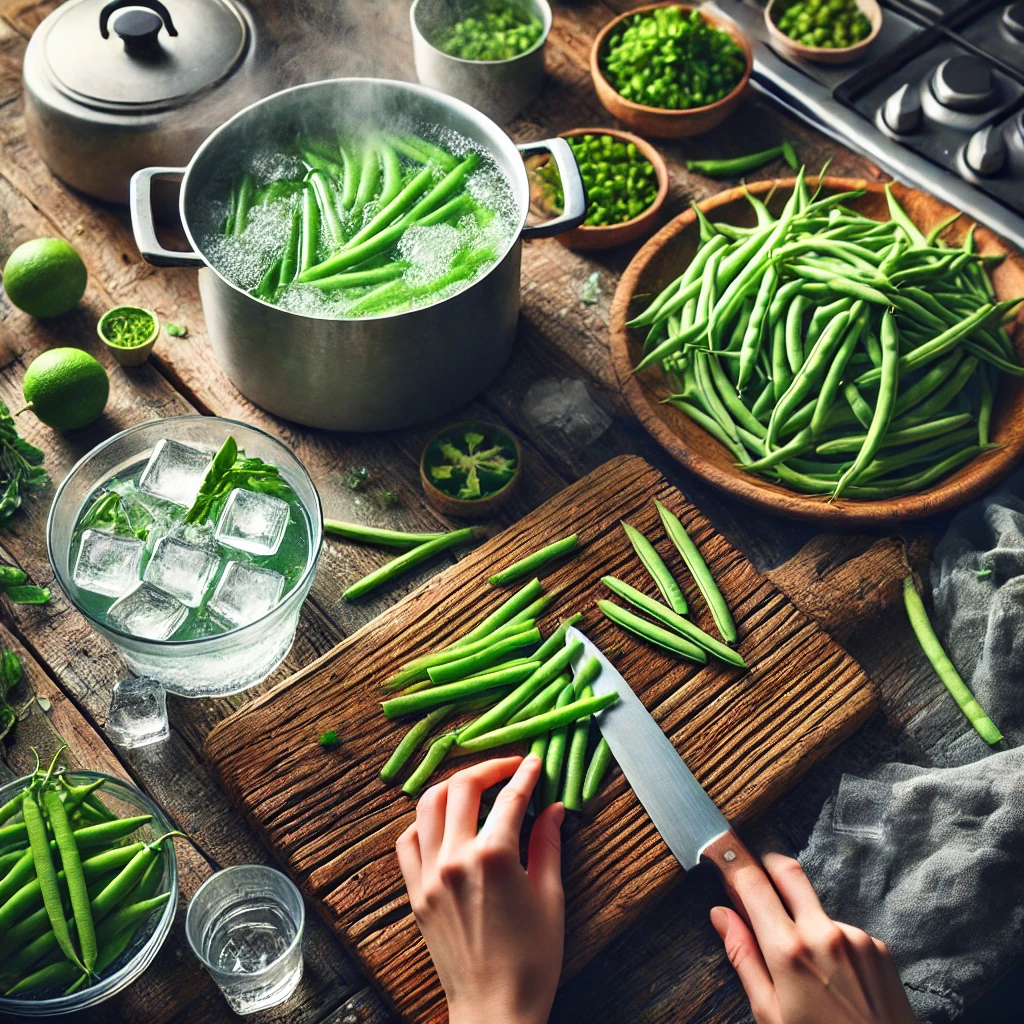
Step 3: Blanch the Green Beans
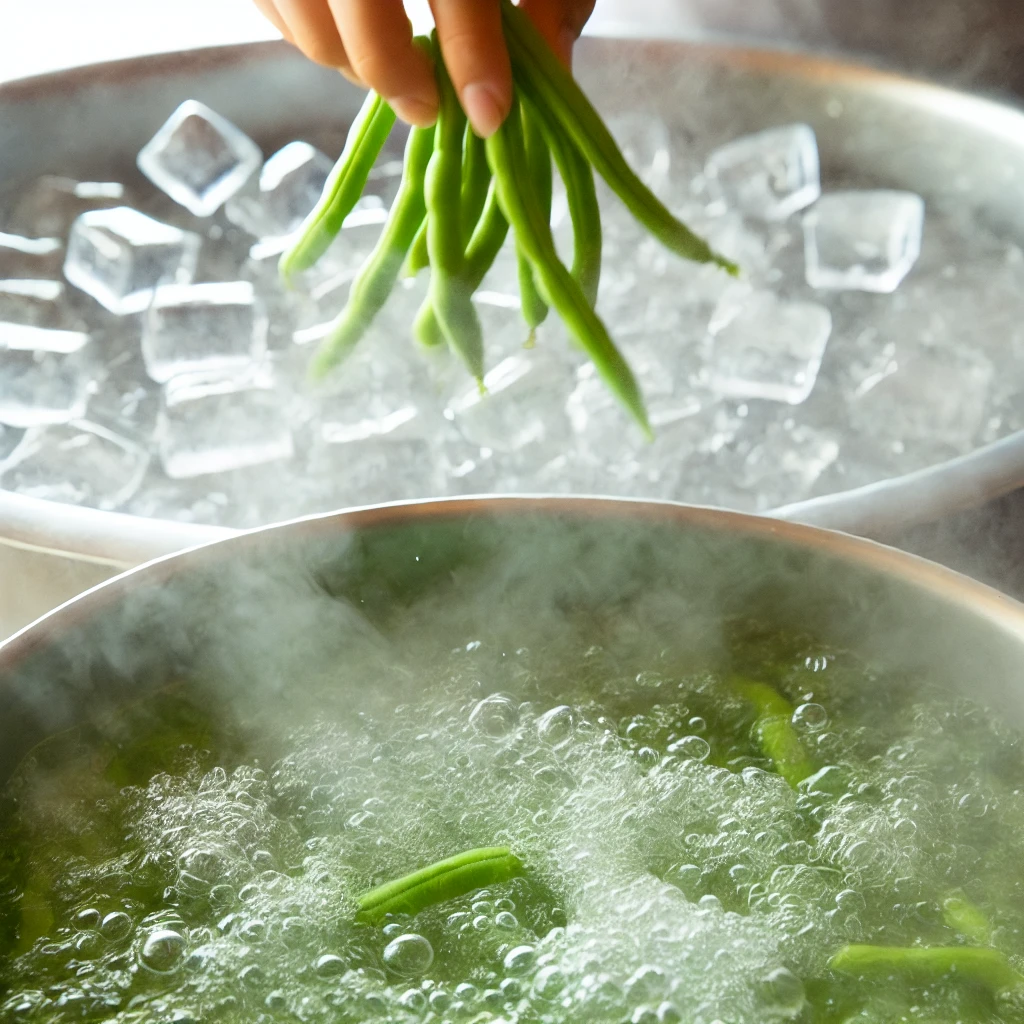
Blanching is one of the most crucial steps in the freezing process.
It might seem like an unnecessary extra step, but it plays a significant role in maintaining the beans’ vibrant green color, texture, and flavor.
Blanching is essentially a quick boil followed by rapid cooling in ice water, which halts the cooking process.
Here’s why and how you should blanch green beans:
- Why Blanch? Blanching helps to preserve the beans’ texture and color by inactivating the enzymes that can cause vegetables to spoil, even in the freezer.
- Without blanching, green beans can become discolored, mushy, and lose their flavor over time.
- Blanching also helps to kill any remaining bacteria and preserves the beans’ nutritional value.
- How to Blanch:
- Boil: Boil some water in a large stock pot. You’ll need enough water so that when the beans are added, they can circulate freely. This ensures that all the beans are evenly blanched.
- Blanch: Add your prepared green beans to the boiling water. It’s best to work in batches so the water doesn’t lose its boil. Boil the beans for 2 to 3 minutes, depending on their size. Smaller, more tender beans may need less time, while larger ones may require the full 3 minutes. You want the beans to be heated through but not fully cooked.
- Ice Bath: Immediately after boiling, use a slotted spoon or tongs to transfer the beans to a large bowl of ice water. This step is crucial, as it stops the cooking process and helps retain the beans’ color and crispness. Let the beans sit in the ice bath for the same amount of time they were boiled—about 2 to 3 minutes.
- Dry Thoroughly: After the beans have cooled, drain them in a colander and pat them dry with a clean kitchen towel or paper towels.
- Removing excess moisture is important to prevent ice crystals from forming on the beans during freezing, which can affect their texture.
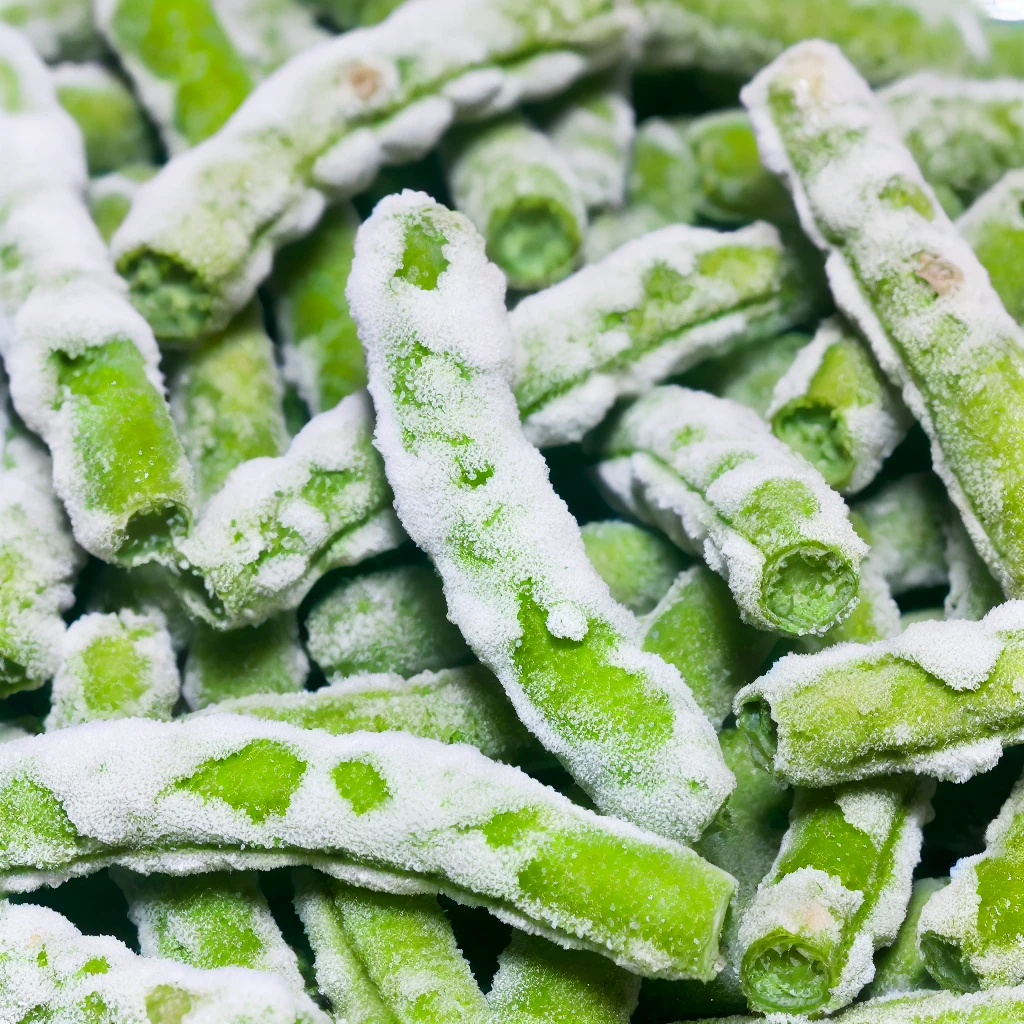
Step 4: Flash Freeze the Green Beans
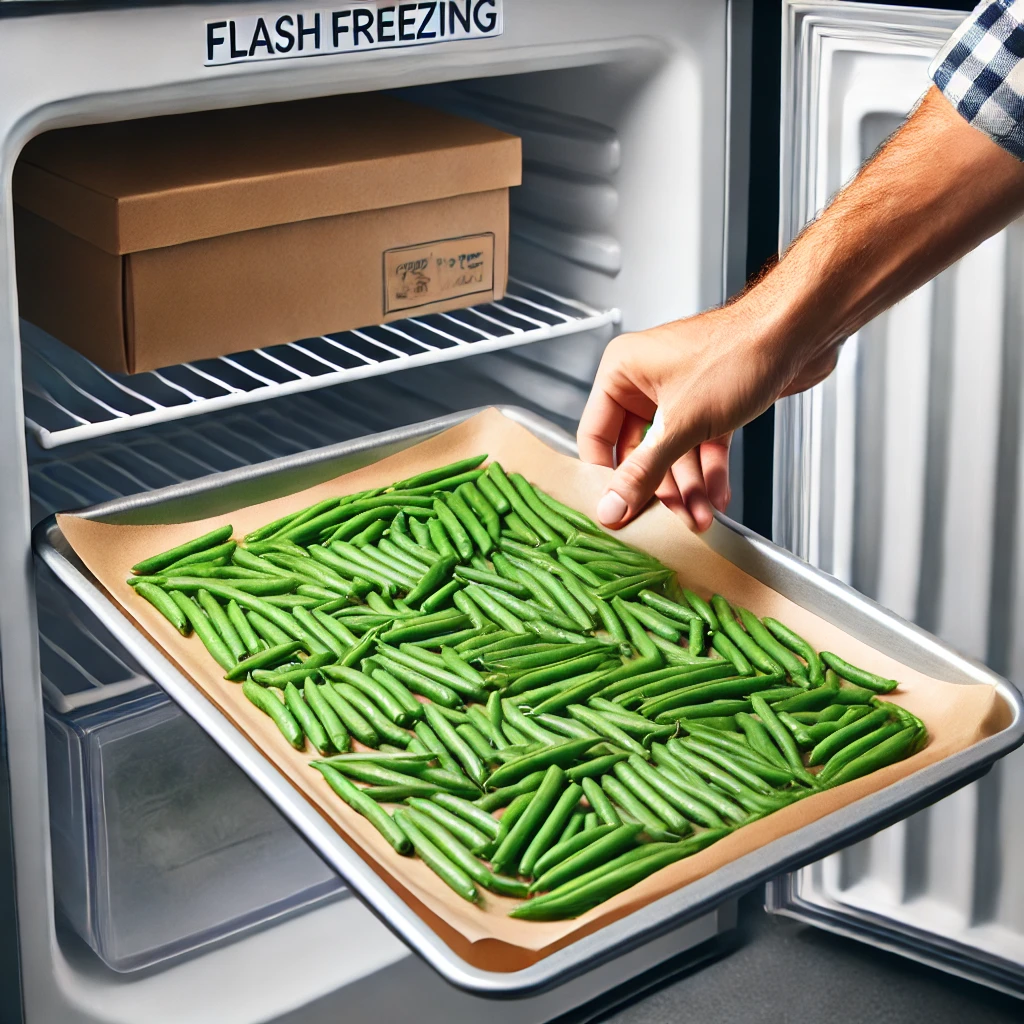
Flash freezing, or freezing the beans in a single layer, helps prevent the beans from sticking together, making it easier to grab a handful at a time later.
This method also helps preserve their individual shape and texture. Here’s how to do it:
- Spread on a Baking Sheet: Once your beans are completely dry, spread them out in a single layer on a baking sheet.
- Make sure the beans aren’t touching each other, as this will help them freeze individually rather than clumping together.
- Freeze: Place the baking sheet in your freezer, making sure it’s flat and undisturbed.
- Leave the green beans to freeze for 1 to 2 hours, or until they are completely solid.
- This initial freezing process helps maintain their structure and prevents them from becoming mushy when stored together.
- Transfer to Freezer Bags: Once the beans are fully frozen, you can transfer them to airtight freezer bags or containers.
- Be sure to remove as much air as possible before sealing the bags—this helps prevent freezer burn and keeps the beans fresh for longer.
- For added convenience, you can portion the beans into the amount you usually need for recipes, such as 1 or 2 cups per bag.
- Label and Store: Don’t forget to label the bags with the date of freezing.
- This helps you keep track of how long they’ve been stored.
- Properly frozen green beans can last up to 12 months in the freezer, but for best quality, it’s recommended to use them within 6 to 8 months.
Flash freezing is a key step in preserving the beans’ texture and ensuring they don’t clump together, allowing for easy use straight from the freezer when needed.
By following these steps, you’ll ensure that your green beans retain their vibrant color, crisp texture, and delicious flavor long after they’ve been frozen!
Here’s how to blanch green beans:
- Boil water in a large stock pot.
- Add the trimmed green beans to the boiling water and cook for about 2-3 minutes.
- Quickly move the beans to a large bowl filled with ice water to halt the cooking process.
- Allow them to sit in the ice water for the same duration as their boiling time.
- Drain the beans thoroughly and pat them dry with a clean kitchen towel or paper towels.
Step 4: Flash Freeze the Green Beans
To prevent the green beans from clumping together in the freezer, freeze them in one single layer.
This step is called flash freezing and helps maintain the beans’ shape and texture.
- Spread the blanched and dried green beans on a baking sheet in a single layer, making sure they’re not touching each other.
- Place the baking sheet in the freezer for 1-2 hours, or until the beans are completely frozen.
- Once frozen, transfer the green beans into airtight freezer bags or containers.
Step 5: Store in Freezer Bags
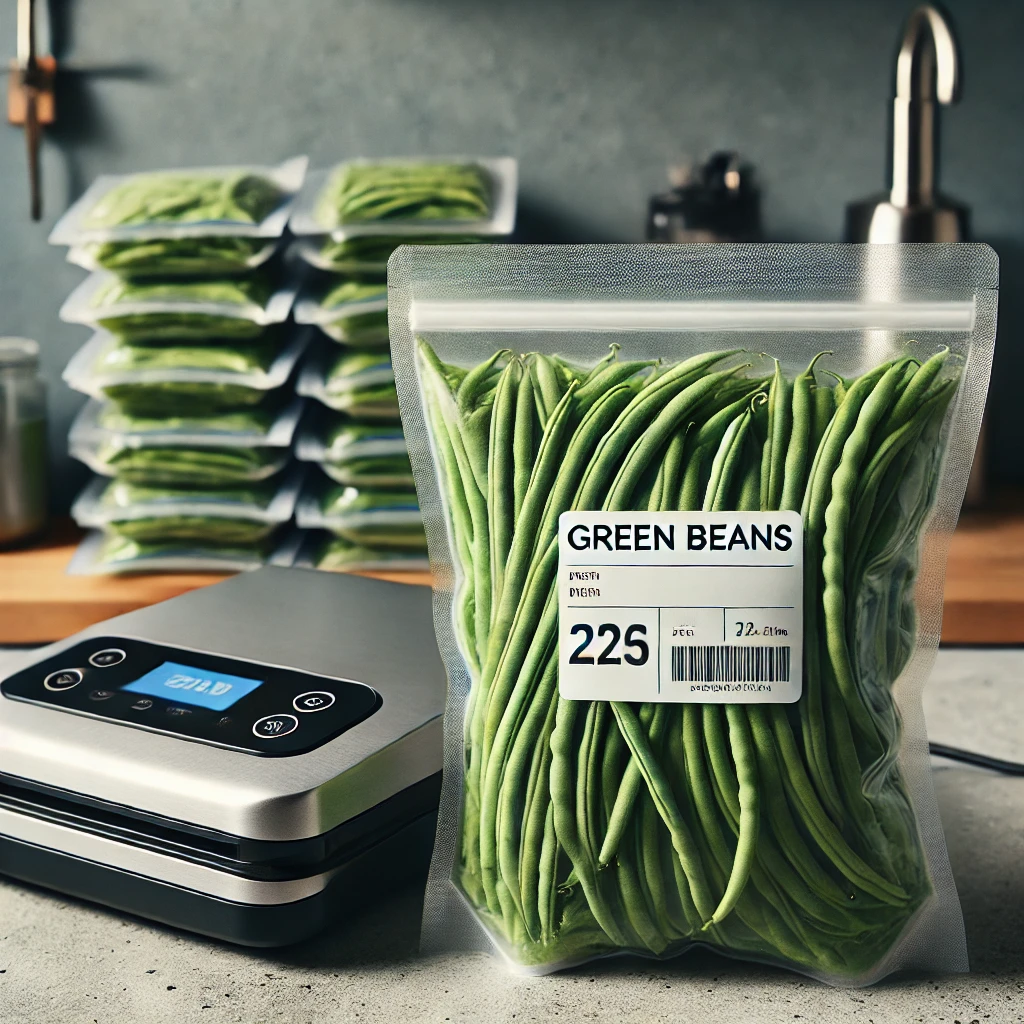
When transferring the frozen green beans to freezer bags or containers, squeeze out as much air as possible to prevent freezer burn.
For best results, use vacuum-sealed bags or freezer-safe containers designed to lock in freshness.
Hacks for Freezing Green Beans Perfectly
While the basic steps of freezing green beans are straightforward, there are a few hacks that can help you take your freezing game to the next level.
Here are some tips to ensure your green beans stay crisp and flavorful:
1. Use Salted Water for Blanching
For an added boost of flavor, consider adding a small amount of salt to the blanching water.
This enhances the beans’ natural flavor and helps them retain their bright green color.
However, be mindful not to oversalt, as the beans can absorb some of the salt during the blanching process.
2. Invest in a Vacuum Sealer
While freezer bags work well, a vacuum sealer is the gold standard for preserving frozen food.
Vacuum-sealing green beans ensures that all air is removed from the bag, significantly reducing the risk of freezer burn and extending the shelf life of your green beans.
This is especially helpful if you plan to store them for several months.
3. Freeze in Portion-Sized Batches
To make it easier to use the green beans later, freeze them in portion-sized batches.
This way, you can grab just the right amount without having to thaw the entire batch.
It also helps prevent unnecessary waste and ensures that you use your frozen beans efficiently.
4. Keep Your Freezer Organized
Label your freezer bags or containers with the date and the portion size of the beans.
A well-organized freezer makes it easy to find and use your frozen green beans without them getting lost in the back.
Plus, using older beans first helps avoid spoilage.
Pros and Cons of Freezing Green Beans
Like any food preservation method, freezing green beans comes with its advantages and disadvantages.
Let’s explore the pros and cons so you can decide if freezing is the right choice for your green bean storage.
Pros:
- Retains Nutrients: Freezing locks in essential nutrients, keeping green beans healthy and flavorful.
- Convenient: Frozen green beans are easy to store and use in various recipes, making them a convenient option for busy weeknights.
- Prevents Waste: If you have a surplus of green beans, freezing is an excellent way to avoid food waste.
- Versatile: You can use frozen green beans in soups, stir-fries, casseroles, and more without the need for fresh produce.
Cons:
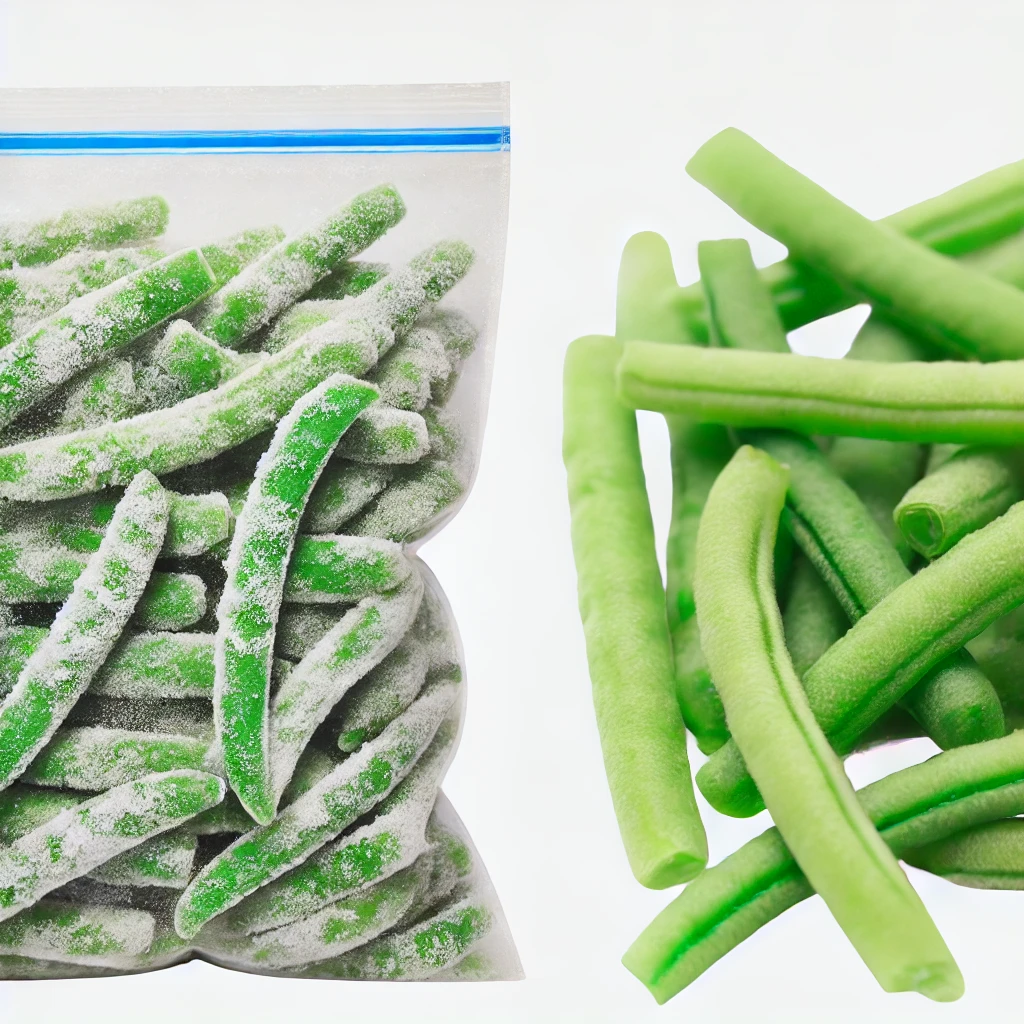
- Texture Changes: While freezing retains the flavor of green beans, it can sometimes affect the texture.
- Requires Freezer Space: Depending on how many green beans you’re freezing, you may need a significant amount of freezer space.
- Blanching Is Time-Consuming: The blanching process, while important, adds an extra step that some people may find tedious.
How to Use Frozen Green Beans After Freezing
Once you’ve mastered the art of freezing green beans, you’ll find that there are endless ways to incorporate them into your meals.
The key is knowing how to use them effectively in different recipes. Here are some popular ways to use frozen green beans:
1. Stir-Fries
Frozen green beans are a fantastic addition to stir-fries.
Their crispness holds up well when cooked quickly over high heat, and they pair perfectly with meats, tofu, or other vegetables.
Simply toss them directly into the pan from the freezer, and they’ll be ready in minutes.
2. Casseroles
One of the most popular ways to use frozen green beans is in casseroles.
Classic green bean casseroles, made with creamy sauces and crispy toppings, are a favorite for holiday meals.
Frozen green beans work just as well as fresh beans in these dishes, saving you time and effort.
3. Soups and Stews
Add frozen green beans to soups and stews for an easy way to boost the nutritional content of your meals.
4. Roasted Vegetables
Frozen green beans can also be roasted for a crispy, flavorful side dish.
Toss them in olive oil, garlic, and your favorite seasonings, then roast in the oven until they’re lightly browned and crispy.
Roasted green beans make a perfect complement to roasted meats or as part of a vegetable medley.
5. Sautéed Green Beans
Sautéing is another quick and easy way to prepare frozen green beans.
Heat a little olive oil or butter in a pan, toss in the frozen beans, and cook until they’re heated through.
Add garlic, lemon juice, or herbs for extra flavor.
Frequent Errors to Avoid When Freezing Green Beans
Even though freezing green beans is relatively simple, there are a few mistakes that can negatively impact the final product.
Here are some common mistakes to avoid:
1. Not Blanching the Beans
Skipping the blanching step can result in mushy, discolored beans that lack flavor.
Blanching is essential for preserving the crispness and color of green beans, so don’t skip this step!
2. Overcrowding the Baking Sheet
When flash-freezing green beans, make sure they’re spread out in a single layer on the baking sheet.
If the beans are piled on top of each other, they’ll freeze unevenly and may clump together.
3. Forgetting to Dry the Beans
Excess moisture can lead to ice crystals forming on the green beans, which can cause freezer burn.
Be sure to thoroughly dry the beans after blanching to avoid this issue.
Conclusion
Freezing green beans is an excellent way to preserve their crisp, fresh flavor for future use.
By following the step-by-step guide and implementing a few helpful hacks, you can enjoy the taste of fresh green beans throughout the year.
Whether you’re adding them to stir-fries, casseroles, soups, or roasted vegetable dishes, frozen green beans offer versatility and convenience.
By understanding the pros and cons of freezing and how to use frozen green beans effectively, you’ll be able to make the most of your harvest or bulk purchase.
With the right techniques, you’ll have perfectly preserved green beans ready when you need them.
Mastering the process of freezing green beans ensures that you can enjoy their crisp, fresh flavor year-round, without losing the nutrients and vibrant color that make them so special.
Whether you’re preparing for winter or simply saving an abundance of green beans, following these simple steps—from selecting and blanching to freezing and storage—can make a big difference in retaining the quality of your green beans.
By avoiding common mistakes like skipping the blanching process or overcrowding your freezer bags, you’ll set yourself up for success.
With a few helpful hacks, such as vacuum sealing and freezing in portion-sized batches, you can ensure your frozen green beans stay as delicious as the day you picked or purchased them.
From stir-fries to casseroles, soups, and stews, you’ll find countless ways to use frozen green beans, bringing a touch of freshness to your meals even in the colder months.
Related Articles:
Healthy, Tasty, and Fast: Your New Favorite Air Fryer Asparagus Recipe
Strawberry Prep 101: Learn How to Clean Strawberries
As an Amazon Associate, I earn from qualifying purchases.